Beard trimming is an essential skill for maintaining a well-groomed appearance. Whether you’re a beginner or looking to refine your technique, mastering the use of clippers and scissors can make a significant difference. This guide provides 11 step-by-step techniques to help you achieve a professional-looking beard trim at home.
1. Start with a Clean Beard
A clean beard is the foundation of a great beard trim. Before you begin trimming, make sure to wash your beard thoroughly using a gentle cleanser or a specialized beard shampoo. These products are designed to remove dirt, oil, and any product buildup without stripping away the natural oils that keep your beard healthy and hydrated. Cleansing your beard not only improves hygiene but also makes the trimming process smoother and more consistent.
Once your beard is clean, pat it dry using a soft towel. Avoid rubbing vigorously, as this can cause tangles and increase the chances of split ends. Allow your beard to air-dry completely or use a blow dryer on a low-heat setting if you’re pressed for time. It’s important for your beard to be fully dry before trimming since wet hair tends to look longer than it actually is. Trimming a wet beard can often lead to uneven results, and you may end up cutting off more than intended. Taking these preliminary steps ensures your beard is in its best condition prior to trimming, making the process both precise and effective.
2. Choose the Right Tools
Having the right tools can make all the difference when it comes to beard trimming. Investing in high-quality equipment is essential if you want professional-looking results. Start with a reliable pair of clippers that come with adjustable guards. These guards allow you to control the length of your trim and cater to different beard styles. For example, longer guards are perfect for maintaining a fuller beard, while shorter ones help achieve a neater, cleaner appearance. Look for clippers that offer versatile settings, a sharp blade, and an ergonomic design to ensure ease of use and a smooth trim every time.
Scissors are another critical tool for detailed grooming and shaping. Opt for scissors specifically designed for beard trimming, as they are typically smaller, sharper, and more precise than regular scissors. These are particularly useful for fine-tuning the edges, snipping away stray hairs, and creating a defined shape around your neckline, cheeks, and mustache. Additionally, consider other grooming accessories like a trimmer for outlining, a detailer for intricate work, and brushes or clippers that suit your beard type. Using professional-grade tools not only enhances the quality of your trim but also ensures your beard remains healthy and well-maintained.
3. Comb Your Beard
Before you start trimming, combing your beard is a crucial step that often gets overlooked. A beard comb works wonders for detangling and straightening your hair, creating a uniform look and helping you identify areas that need attention. Begin by combing in the direction of hair growth to smooth out your beard. This allows you to see how the hair naturally falls and helps to separate the strands for better visibility while trimming.
If you have a longer beard, using a wide-tooth comb is highly recommended, as it prevents unnecessary pulling or breakage during combing. For shorter beards, a finer-tooth comb can achieve more control and precision. Pay close attention to any uneven patches or thicker areas as you comb. These will stand out and guide your trimming efforts to achieve a balanced and even finish. Combing also lifts the hair away from the skin, which is particularly important when working with clippers; it prevents accidental cuts and ensures a consistent length across your beard. When done correctly, combing prepares your beard for a more accurate and professional trim.
4. Decide on the Desired Length
Determining the desired length of your beard is a crucial step in the grooming process. It sets the foundation for the style you want to achieve and prevents potential mistakes, such as trimming too short or unevenly. Begin by visualizing your ideal beard length and considering factors such as your face shape, personal preferences, and even workplace or social norms. If you are uncertain, opt for a conservative approach by starting with a longer clipper guard. This gives you room to adjust and refine the length without the risk of cutting too much at once.
For beginners or those experimenting with a new look, patience is key. Take your time to evaluate your beard after each pass with the clippers, as trimming in small increments helps mitigate errors. Remember, you can always trim more, but you can’t undo excessive cutting. It’s also worth noting that different areas of your beard may require slightly varying beard lengths to achieve a cohesive and well-blended appearance. For instance, the cheeks often look best with a shorter trim compared to the chin or jawline, which can be left slightly longer for a more pronounced and defined look. By dedicating time to this step and being deliberate with each adjustment, you set yourself up for a well-groomed and professional result.
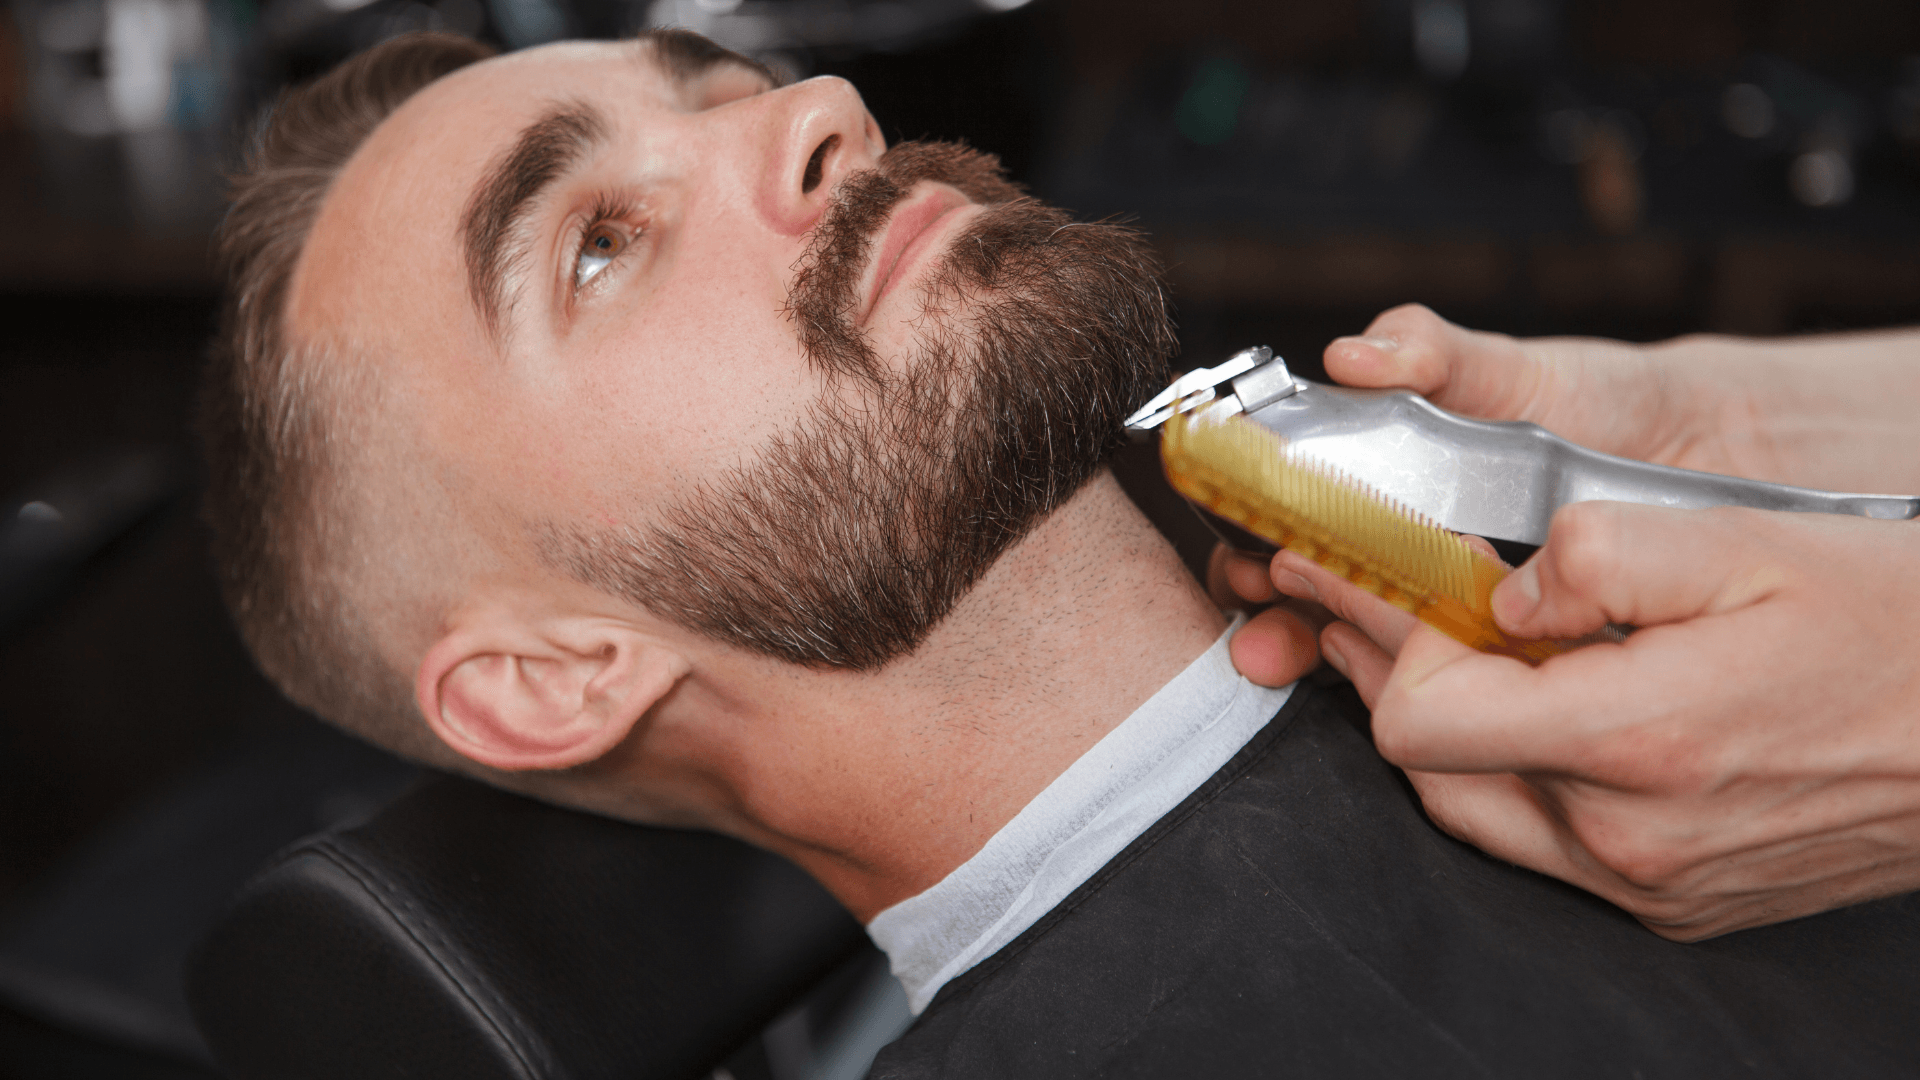
5. Trim with Clippers
Once you’ve decided on your desired beard length, it’s time to move on to the trimming phase. Using beard clippers ensures precision and efficiency, making it the preferred tool for achieving an even, polished appearance. Begin trimming in the direction of hair growth, which helps maintain a natural texture and reduces the risk of irritation or uneven cutting. Starting from the sides of your face, work methodically. Use consistent, slow strokes and avoid rushing through the process, as haste can result in uneven patches or accidental over-trimming.
When tackling the different sections of your beard, adjust the clipper guard length as needed. For example, you might opt for a shorter guard to define areas such as the upper cheeks, while using a slightly longer guard to maintain fullness near the chin or along the jawline. Pay extra attention to transitions between these sections to blend them seamlessly and avoid noticeable lines or abrupt changes in length. Using a mirror—preferably one with magnification—can significantly enhance your visibility and precision during this stage of trimming.
If you’re uncertain about handling clippers or feel intimidated by the process, it’s entirely valid to consider visiting a professional barber. Barbershop in New York City, offer expert guidance and services that can help achieve your desired look while teaching you techniques to use at home. Always remember that practice makes progress, and over time, your comfort and mastery with clippers will grow.
6. Define the Neckline
A well-defined neckline is the key to giving your beard a clean and professional finish. The neckline serves as the lower boundary for your beard, and maintaining it properly can elevate your overall appearance. To begin, imagine a natural curve extending from one ear to the other, passing just above the Adam’s apple. This curved line is your guide to creating an ideal neckline that complements your face shape and beard style.
Before trimming, tilt your head slightly upward to ensure full visibility of the area beneath the jawline. Using clippers without a guard (or with the shortest guard for additional safety), carefully start trimming below the imaginary curved line. Use slow, deliberate strokes to outline the shape, and avoid going too high up the neck, as this can make the beard appear smaller or disconnected from your jawline. Once the line is established, clean up the area below it by removing any remaining scruff or stray hairs, which contributes to a sharp, polished look.
For added precision, you may consider using a straight razor or a trimmer designed for detailing. This can help refine the edges of the neckline and give it a sharper, more professional finish. Be cautious when working around sensitive areas and maintain control of your tools at all times. Periodic maintenance of your neckline is important to sustain a groomed appearance. If you’re unsure about executing this step yourself, visiting a barber for a consultation or regular neck trims is a worthwhile option to ensure your beard consistently looks its best.
7. Shape the Cheek Line
For a neat and polished appearance, defining the cheek line is a crucial step in maintaining a well-groomed beard. The cheek line refers to the upper boundary of the beard that naturally extends from your sideburns down toward the corners of your mouth. While some individuals may prefer a more natural cheek line, giving it a clearly defined edge can enhance your facial symmetry and refine the overall shape of the beard.
Begin by locating your natural cheek line, which typically forms along the highest points where facial hair grows. Use a razor, trimmer, or precision tool specifically designed for detailing to carefully remove any stray hairs that sit above this line. It’s important to avoid cutting too low into the beard, as this can result in an unnatural look or make the beard appear thinner than intended. For optimal results, use slow and deliberate strokes, paying close attention to both sides of your face to ensure symmetry. Standing in good lighting and utilizing a mirror is especially vital during this process.
If you’re unsure about where your cheek line should be, a common technique is envisioning a straight or slightly curved line that connects the top of your sideburn to the edge of your mustache. Alternatively, practice with less drastic trims at first, as you can always remove more hair later if needed. For those with more angular or creative styles, this line can be adjusted to complement your desired look. Once the cheek line is established, you may choose to apply a soothing aftershave or balm to prevent irritation in freshly shaved areas.
8. Switch to Scissors for Detailing
While trimmers and clippers are essential for sculpting a beard’s overall shape, scissors are the go-to tool for areas that require extra precision. Detailing your beard with scissors is ideal for trimming areas such as the mustache, chin, and any flyaway hairs that may be difficult to address with electric tools. Scissors also enable you to maintain control of your cutting length, reducing the risk of over-trimming.
Start by focusing on the mustache, as this area often grows quickly and can obscure your lips if not kept adequately trimmed. Use a fine-tooth comb to lift the mustache hairs and gently guide them into place. With small, careful snips, trim any excess length that extends beyond your top lip, following the natural curve of your mouth. Be conservative with your trimming, as it’s easier to make additional cuts than it is to fix an overly short mustache.
Next, inspect the chin area and the bottom edges of your beard. Use scissors to remove stray or uneven hairs, paying attention to the natural contours of your face. This process helps create balance and symmetry, which will ultimately elevate the overall appearance of your beard. Additionally, inspect the edges of the beard, including around your jawline and sides, to tidy up any stubborn or frayed hairs.
Scissor detailing is an excellent technique for adding final touches to your beard, whether you are preparing for a professional event or simply refining your daily look. Working slowly and deliberately will result in a more polished finish.
9. Blend the Sides and Bottom
Blending the sides and bottom of your beard is a vital step in ensuring that your facial hair appears cohesive and well-maintained rather than patchy or uneven. This step involves tapering the hair from the sides of your face to the bottom of your beard, creating a gradual transition in length. When done correctly, blending enhances the natural contours of your face and avoids the stark, choppy appearance that can occur when lengths are inconsistent.
To begin blending, set your clippers to a slightly shorter guard length than the one used for your chin. Start trimming at the sideburns and move downward along the sides of your face, using smooth and consistent motions. Angle the clippers slightly as you reach the jawline to transition into the beard’s fuller length. On the bottom, increase the guard length to the desired setting to maintain fullness at the chin, which helps emphasize structure and create the illusion of a more defined jawline.
Blending requires practice and patience, so take your time to assess your work periodically. Step back from the mirror to evaluate how the transitions appear from a distance and ensure the beard’s contours suit your facial structure. If you notice areas where the taper is uneven, make small adjustments and avoid over-trimming. Some areas may require added attention, such as the region around the jaw corners, where sharp angles must seamlessly connect the sides and bottom.
If you’re uncertain about achieving professional results on your own or are experimenting with a new style, consulting a skilled barber in New York or elsewhere can be invaluable. Professional barbers not only have the expertise to tailor techniques to your specific beard type and face shape but can also demonstrate proper blending methods for you to replicate at home. Routine visits to a barber can also help maintain your beard’s overall shape and keep you looking your best.
Blending mastery, combined with attention to other grooming steps, ensures your beard achieves a cohesive and polished appearance, making it a defining feature of your personal style.
10. Check for Symmetry
Once you’ve completed trimming and blending your beard, it’s crucial to check for symmetry to ensure a balanced and polished look. Stand in front of a mirror and examine your beard from multiple angles – front-on, side profiles, and even from slightly above or below. Symmetry plays a significant role in enhancing the overall aesthetic, as an uneven beard can distract from your desired appearance. Look closely at both sides of your face, comparing the lengths, shapes, and contours of the beard. Pay particular attention to areas like the cheek lines, jawline, and neckline, as these can often reveal slight inconsistencies.
To assist in achieving symmetry, you may also use tools such as a hand-held mirror to view the back and underside of your beard by reflecting it against a larger mirror. Alternatively, take a photograph of your beard from different angles, as this can help highlight subtle discrepancies that may be harder to detect in real-time reflection. Once you’ve identified any uneven sections, make careful, small adjustments. Use a trimmer or scissors with a steady hand, and trim conservatively to avoid over-compensating or cutting too much. Remember that symmetry doesn’t always mean absolute perfection – a beard should look natural while still appearing cohesive and balanced.
11. Moisturize and Style
After completing the trimming process, moisturizing and styling your beard is a vital final step for achieving a refined and healthy appearance. Begin by using a high-quality beard oil or balm, which not only nourishes the beard hair but also hydrates the skin underneath. This helps prevent dryness, itching, and flakiness, ensuring that your beard feels as good as it looks. Apply a few drops of beard oil or a small amount of balm evenly onto your palms, then gently massage it into the beard. Focus on working the product into the roots and skin before spreading it along the length of the beard to help maintain its texture and luster.
A well-moisturized beard appears softer, shinier, and more manageable, and the products often leave a pleasant scent, adding to the grooming experience. After hydration, use a comb or beard brush to shape and style your beard. A wide-tooth comb helps detangle the hair and ensures the distribution of the oil or balm, while a beard brush can help with smoothing and laying down stray hairs. Brush or comb in the direction of your beard’s natural growth to enhance its natural flow and structure. Styling your beard not only maintains its desired shape but also ensures it stays neat and tidy throughout the day, allowing your carefully trimmed work to truly shine.
Conclusion
Mastering beard trimming with clippers and scissors takes practice, but with these 11 techniques, you’ll be well on your way to achieving a well-groomed look. Whether you’re maintaining a short stubble or a full beard, these steps ensure a clean, polished result every time.
By following these tips, you can confidently trim your beard at home or seek professional help when needed. Remember, a well-maintained beard not only enhances your appearance but also boosts your confidence.